The Drawing Editor
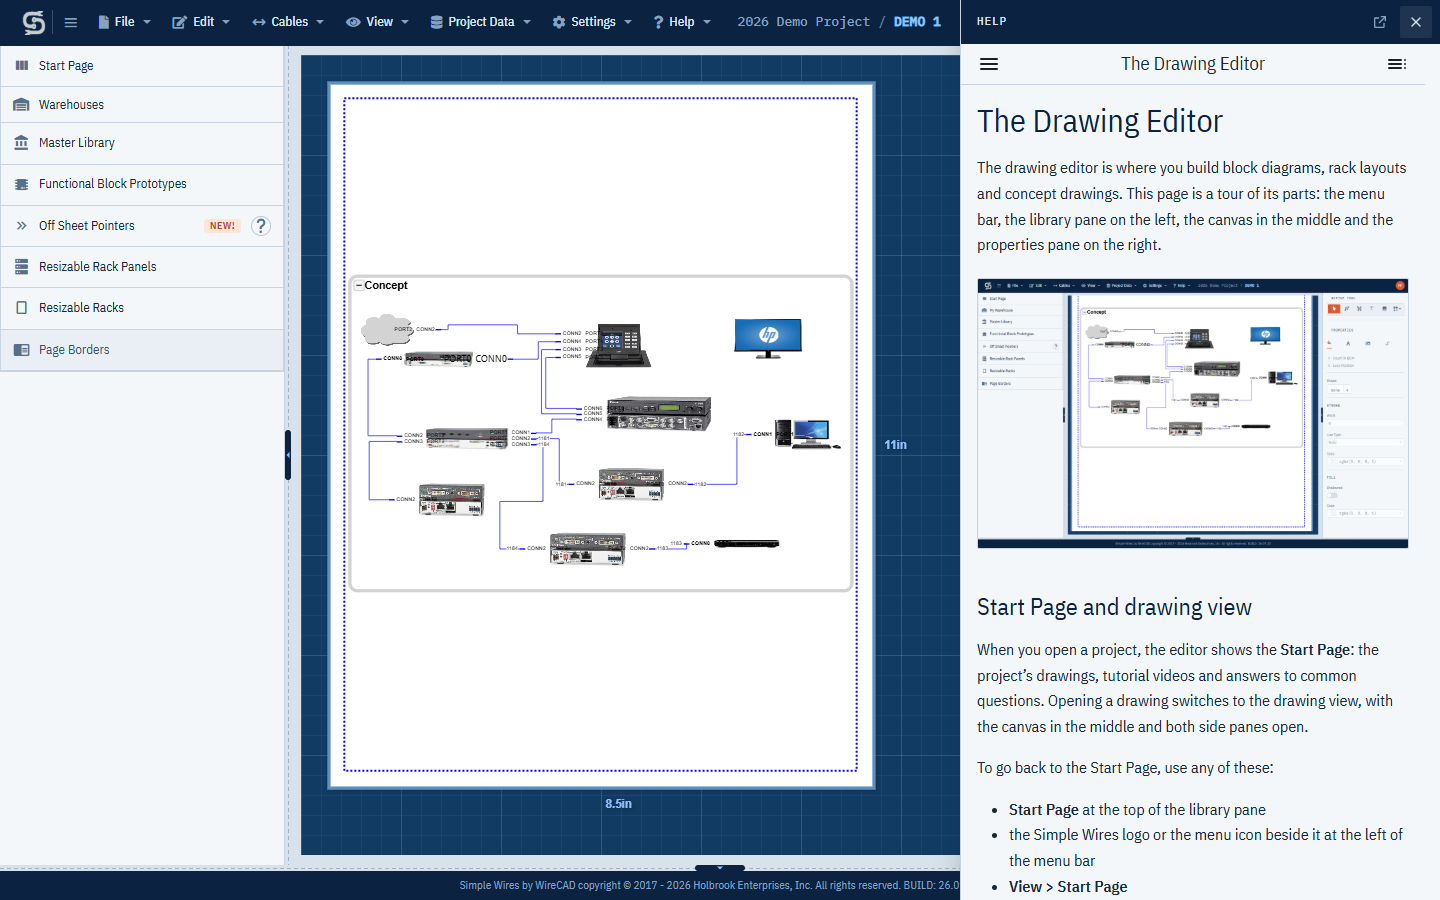
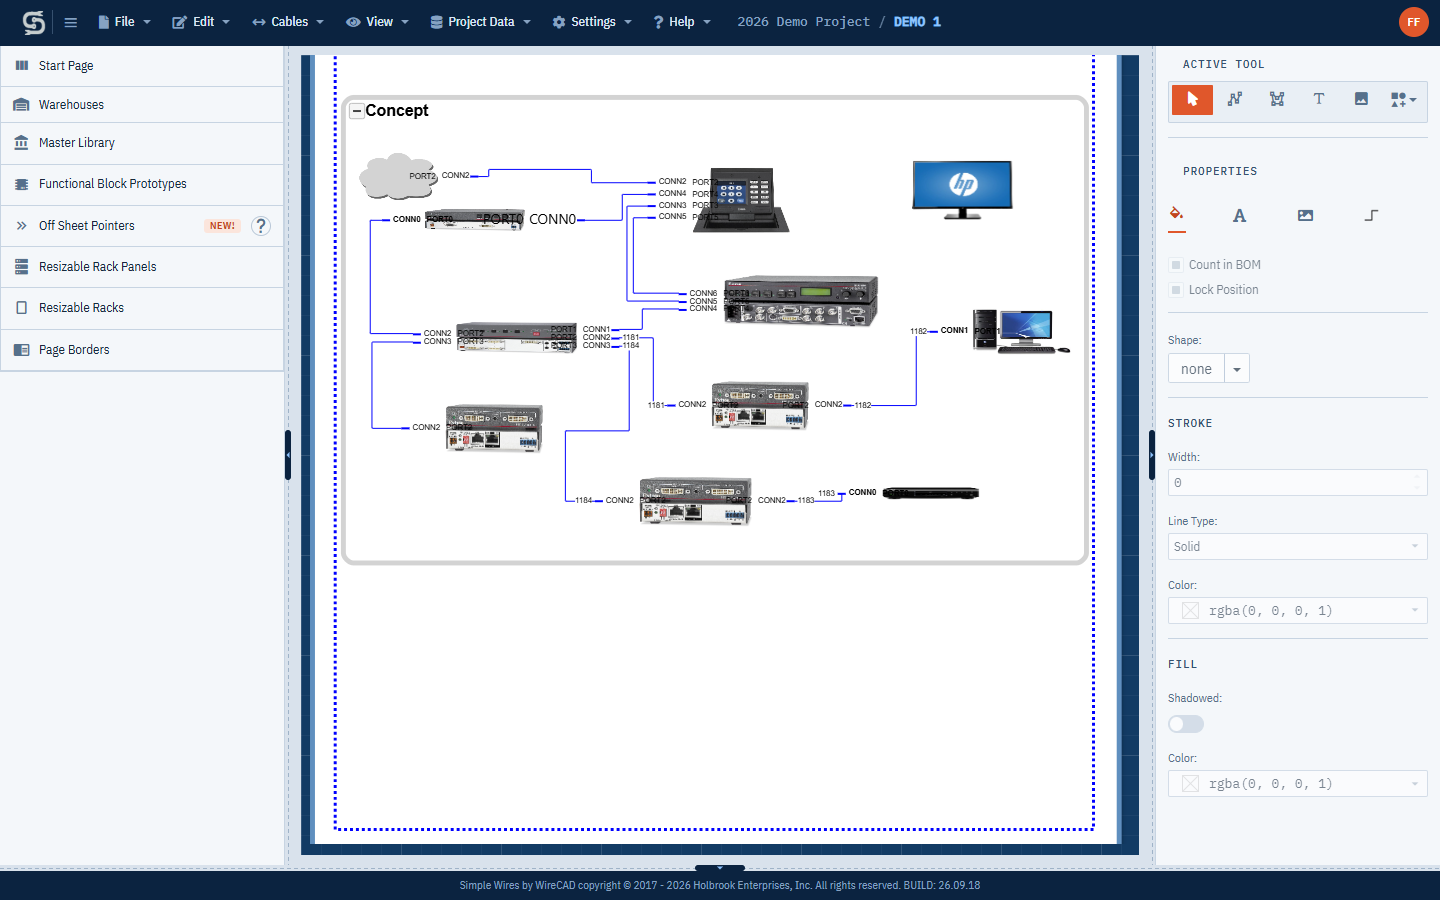
The drawing editor is where you build block diagrams, rack layouts and concept drawings. This page is a tour of its parts: the menu bar, the library pane on the left, the canvas in the middle and the properties pane on the right.
Start Page and drawing view
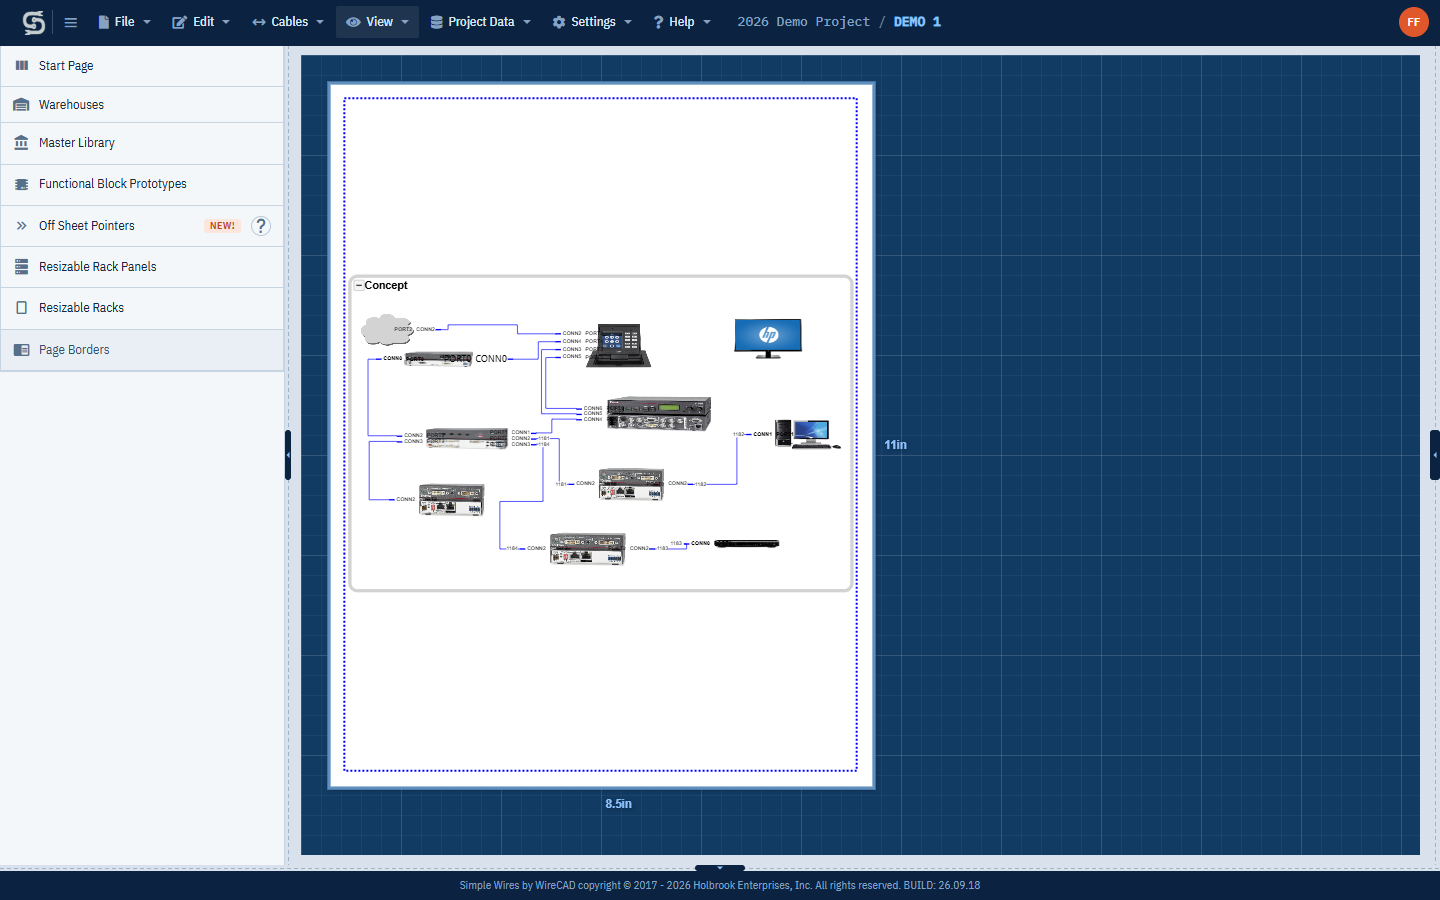
When you open a project, the editor shows the Start Page: the project’s drawings, tutorial videos and answers to common questions. Opening a drawing switches to the drawing view, with the canvas in the middle and both side panes open.
To go back to the Start Page, use any of these:
- Start Page at the top of the library pane
- the Simple Wires logo or the menu icon beside it at the left of the menu bar
- View > Start Page
See Drawings and the Start Page for creating, opening and managing drawings.
The menu bar shows where you are as Project / Drawing. It adds View Only when you can’t change the project, and Saving changes… while a save is in progress.
The menu bar
The menus change with the view. The Edit and Settings menus, and the drawing commands on the File menu, appear only while a drawing is open.
| Menu | What it’s for | More |
|---|---|---|
| File | New …, Open, Rename …, Save (Ctrl + S), Save As … and Delete for drawings; Print and Export to PDF, DWG, PNG and SVG. In a data grid it shows Export to Excel instead. | Drawings, Printing and Exporting |
| Edit | Undo, Redo, Cut, Copy, Paste, Delete, and the Grouping, Alignment and Z-Order submenus. | Grouping, aligning and stacking |
| Cables | Number All, Number Remaining and Reset All for cable numbers. | Drawing Cables |
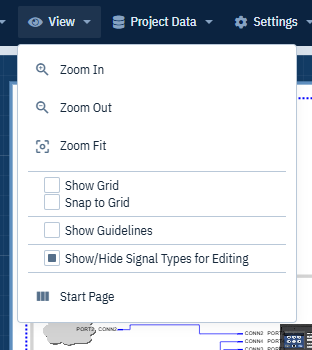
| View | Zoom In, Zoom Out, Zoom Fit, Show Grid, Snap to Grid, Show Guidelines, Show/Hide Signal Types for Editing and Start Page. | Grid, snap and guidelines |
| Project Data | The project-wide grids: Signal Types, Drawings and Revisions, Equipment, Bill of Materials and Cables. | Project Data Grids, Signal Types, Drawing Revisions |
| Settings | Active Stroke, Active Fill and Active Text Style for new items, Page Settings, and Cable Behavior. | Page Setup and Drawing Settings |
| Help | Help Contents, Help for This View, Forum, and Submit this drawing to support. | Getting help |
The avatar with your initials at the right end of the menu bar opens your account menu: Upgrade (on the Free plan), Projects Dashboard, Billing, Manage Password, Theme and Logout. See Projects Dashboard, Billing and Plans, Your Account and Themes and Appearance.
What you see depends on your permissions. If you can only view a project, the commands that change a drawing are hidden. Team members with the VIEWER role also don’t see the print and export commands. See Sharing Projects and Teams.
The library pane
The left pane holds everything you can drag onto the canvas. Click a section header to expand or collapse it, then drag an item from the section and drop it on the canvas.
| Section | Contains | More |
|---|---|---|
| Start Page | Returns to the project’s Start Page. | Drawings and the Start Page |
| Warehouses | Your own saved items and the ones shared with the project, reusable in any drawing. | Warehouses |
| Master Library | Opens the Master Library dialog to search for equipment by manufacturer and model. | Master Library |
| Functional Block Prototypes | Generic blocks with ports, ready to name. | Functional Blocks and Ports |
| Off Sheet Pointers | Pointers that link a cable to another drawing. | Off Sheet Pointers |
| Resizable Rack Panels | Rack panels to mount in racks. | Racks and Rack Panels |
| Resizable Racks | Equipment racks you size in rack units. | Racks and Rack Panels |
| Page Borders | Title blocks for the drawing sheet. | Page borders |
Icons or list
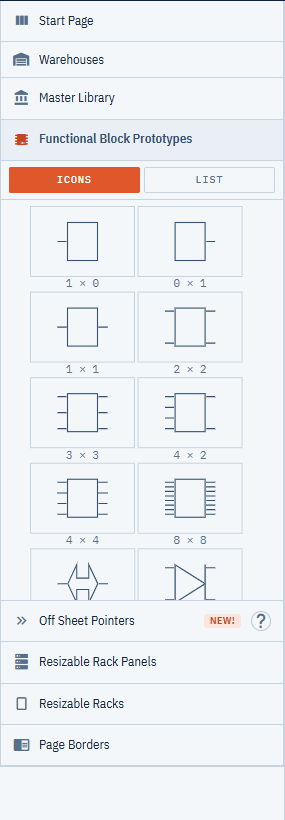
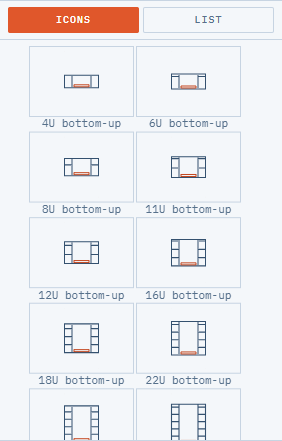
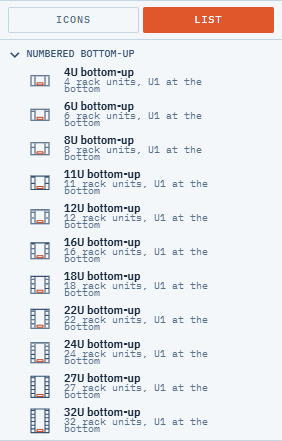
Functional Block Prototypes, Off Sheet Pointers, Resizable Rack Panels, Resizable Racks and Page Borders each show an Icons and a List button at the top.
- Icons shows two drawings of each item per row.
- List shows one item per row, grouped under headings such as Numbered bottom-up or Half width, with its name and a line describing it, for example 42 rack units, U1 at the bottom. Click a heading to fold that group away.
The choice applies to all five sections at once and is remembered in your browser. Dragging works the same in both views.
The canvas
The canvas shows the drawing sheet. The page outline and margins come from Settings > Page Settings (see Page Setup and Drawing Settings). Keep your drawing inside the page outline so it lands on the sheet when you print or export.
Zooming and panning
- Turn the mouse wheel to zoom in and out.
- View > Zoom In and View > Zoom Out zoom in steps.
- View > Zoom Fit zooms so that everything in the drawing fits the canvas.
- Use the scroll bars, or drag on an empty part of the canvas, to move around.
Selecting and editing
With the Select tool active (the arrow button under Active Tool):
- Click an item to select it. Shift+click or Ctrl+click adds items to the selection, and dragging a box around items selects them all.
- Drag a selected item to move it. The arrow keys nudge the selection; hold Ctrl to move one pixel at a time.
- Drag the square handles to resize, and the round handle to rotate.
- Click a piece of text, such as a port name or a block’s SysName, to edit it in a small card beside it. Press Enter or click elsewhere to save, or Esc to cancel. See Naming blocks.
- Drag from a port to another port to draw a cable. See Drawing Cables.
- Right-click a block, port, rack, rack panel or group to open its context menu.
Common shortcuts include Ctrl+S to save, Ctrl+C, Ctrl+X and Ctrl+V to copy, cut and paste, and Delete to delete the selection. See Keyboard Shortcuts for the full list.
Grid, snap and guidelines
The View menu has switches that help you line things up. Each is saved with the drawing.
- Show Grid shows or hides the background grid.
- Snap to Grid makes items snap to the grid as you move and resize them.
- Show Guidelines draws temporary lines while you drag an item, when its edges or center line up with a nearby item.
- Show/Hide Signal Types for Editing swaps the connector labels on every functional block in the drawing for their signal types, so you can change them. See Port signal types.
The properties pane
The right pane has two parts.
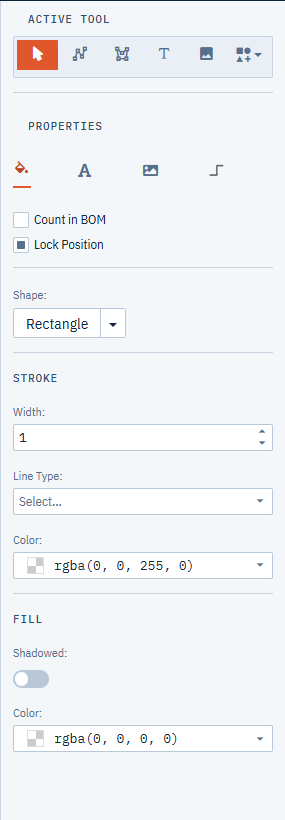
Active Tool picks what a click or drag on the canvas does: Select, Polyline, Polygon, Text, Image or Shape. A drawing tool stays active until you pick another one, so click Select when you are done drawing. See Drawing tools.
Properties shows the settings of the current selection on four tabs, labelled with icons:
| Tab | Settings | More |
|---|---|---|
| General (paint bucket) | Count in BOM, Lock Position, Shape, Stroke and Fill | Lock Position and Count in BOM, Shape formatting |
| Text (letter A) | Text Kind, bold, italic, visibility, Font, Size, Foreground and Rotation | Text |
| Image (picture) | Image URL, Visible, Stretch, Upload Image and Uploaded Images | Images |
| Cable (cable) | Cable labels, lock, length, stroke and cable type | Cable properties |
When you select a cable the pane switches to the Cable tab; when you select anything else it switches to General. With nothing selected the settings are disabled. If you select several items whose values differ, that field shows blank; setting it applies the value to all of them.
Resizing and hiding the side panes
Both side panes open when you open a drawing, and close when you go to the Start Page or a Project Data grid.
- To make a pane wider or narrower, drag the handle on its inner edge, between the pane and the canvas.
- To hide a pane, click the small arrow button in the middle of its handle. A narrow strip stays at the edge of the window.
- To bring the pane back, click the arrow button on that strip.
The canvas grows and shrinks to fill the space.
Getting help
Press F1 anywhere in the editor to open the Help panel at the topic for what you are doing. For example, in a drawing it opens this page, with the Cable tab showing it opens Cable properties, and in the Add Ports dialog it opens Adding ports. F1 works inside dialogs and while the Settings menu is open.
- Press Esc or click the close button to hide the panel.
- Click the new-tab button at the top of the panel to open the page in its own browser tab.
- Help > Help Contents opens the manual’s contents in the panel, and Help > Help for This View does the same as F1.
- Round ? buttons, such as the one on the Off Sheet Pointers header, open the topic for that feature.
The Help menu also has Forum, which opens the Simple Wires forum in a new tab, and Submit this drawing to support, which asks for a message and then sends a copy of the open drawing to the support team.