Projects Dashboard
The Projects Dashboard lists every project you own or that has been shared with you. Use it to create, open, rename, copy, share, archive and delete projects.
You land on the dashboard when you sign in. From the drawing editor, click your initials at the top right and choose Projects Dashboard. From other account pages, click Dashboard in the top menu.
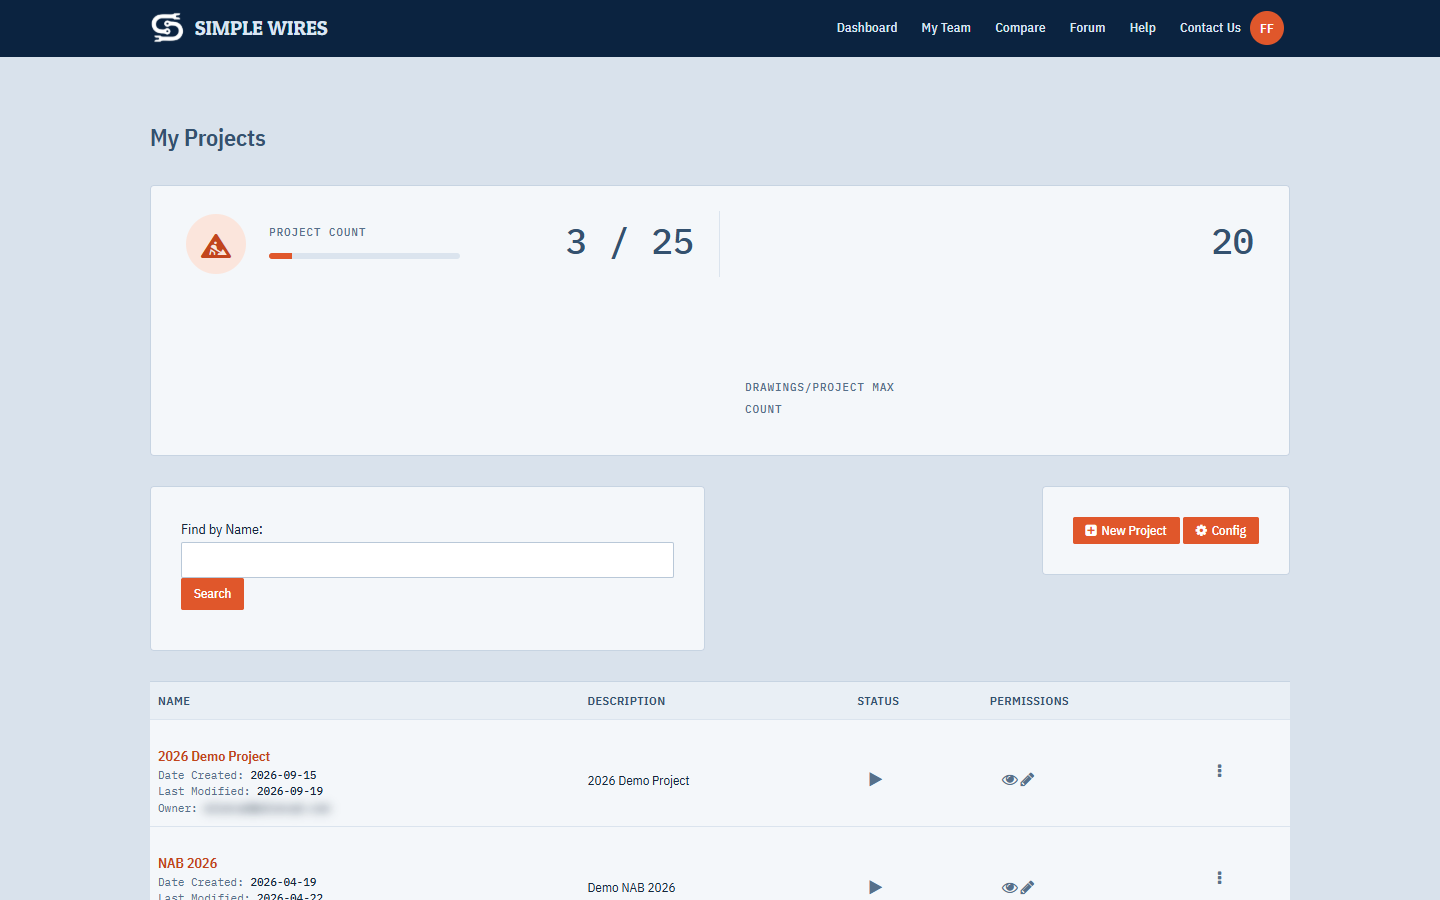
The project list
The page is titled My Projects. If you belong to a team, it is titled Projects Assigned to Me.
Each row shows:
- NAME: the project name, with Date Created, Last Modified and Owner underneath. Click the name to open the project.
- Description
- Status: a play icon for an active project, or an archive icon for an archived one.
- Permissions: an eye icon means you can view the project. A pencil icon next to it means you can also edit it. A row with only the eye icon is view only.
- The row menu (the vertical dots at the end of the row). See The project menu.
The list shows ten projects per page, with page links at the bottom. Click the NAME column heading to switch between A to Z and Z to A.
To find a project, type part of its name in Find by Name and click Search. Clear the box and click Search again to see all projects.
Project limits
The counters above the list show your plan’s limits:
- Project Count shows your active projects against the number your plan allows, for example 3 / 5. Archived projects don’t count. Projects shared with you do count.
- Drawings/Project Max Count shows the most drawings your plan allows in one project.
If you are on a team, the counts are those of the team owner’s plan.
When you reach the project limit, New Project and Save As are refused with a message. Archive a project you aren’t using, or change your plan. See Billing and Plans.
If you have more active projects than your plan allows, for example after moving to a smaller plan, the dashboard archives the extra projects when it loads. It keeps the first projects in name order active. On the Free plan only your first project stays active.
Creating a project
- Click New Project.
- Enter a Project Name. It must be different from your other projects’ names.
- Enter a Description (optional).
- If you are on a team, choose the Team the project belongs to. Everyone on that team is added to the project.
- Click Save Project.
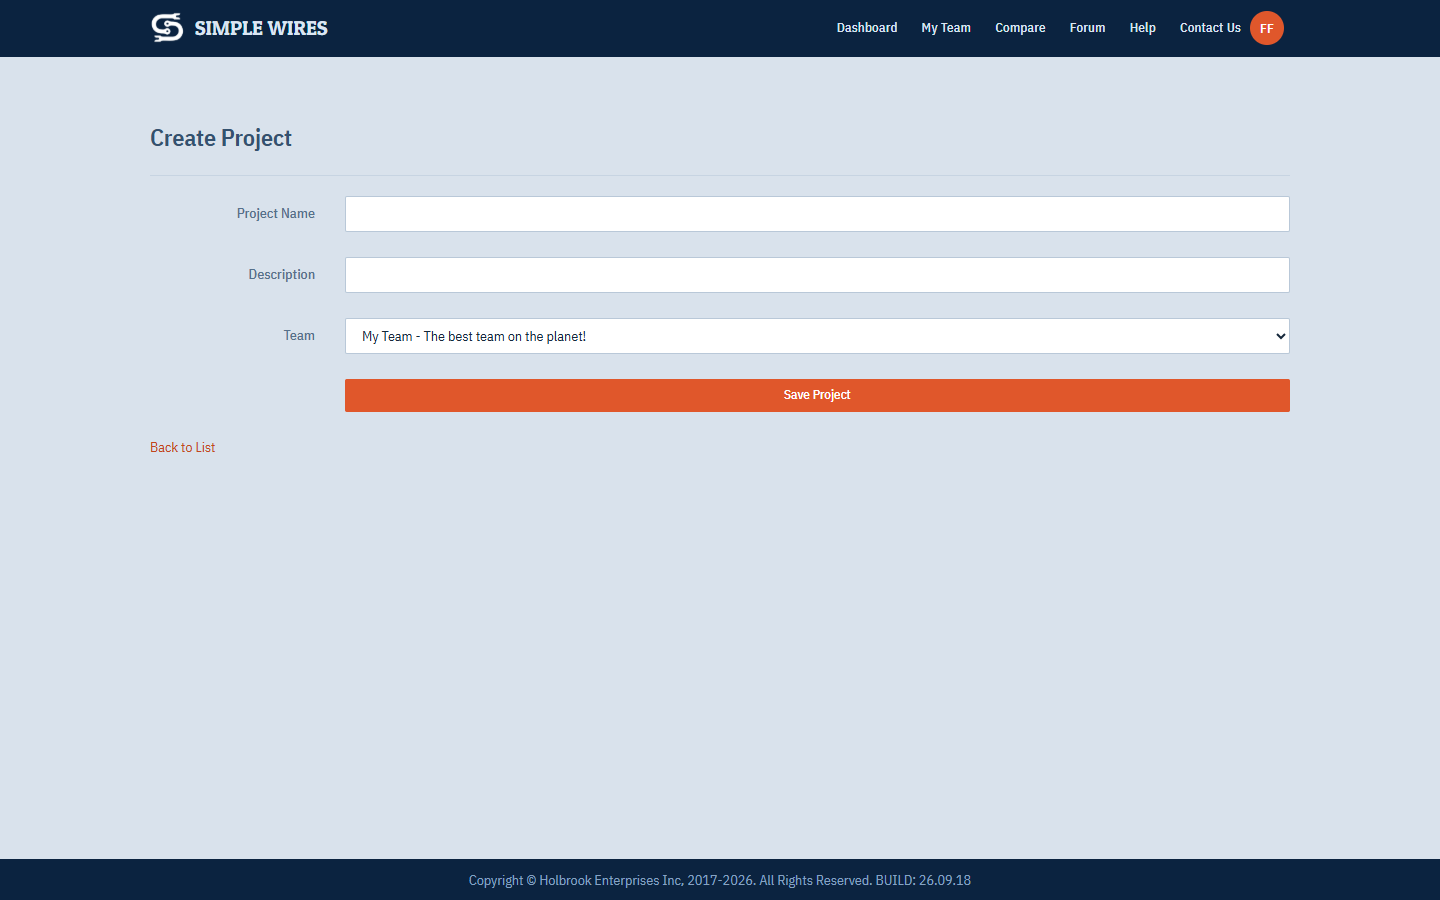
The new project contains one empty drawing, Drawing 1. Its standard signal types are added the first time you open it.
If your team role doesn’t allow creating projects, the New Project button isn’t shown. See Teams.
Opening a project
Click the project name, or choose Open Project from the row menu. The project opens on its Start Page. See Drawings and the Start Page.
Archived projects can’t be opened. Their name isn’t a link until you extract the archive.
The project menu
Click the vertical dots at the end of a row to open its menu. The commands you see depend on your permissions for that project and on your plan.
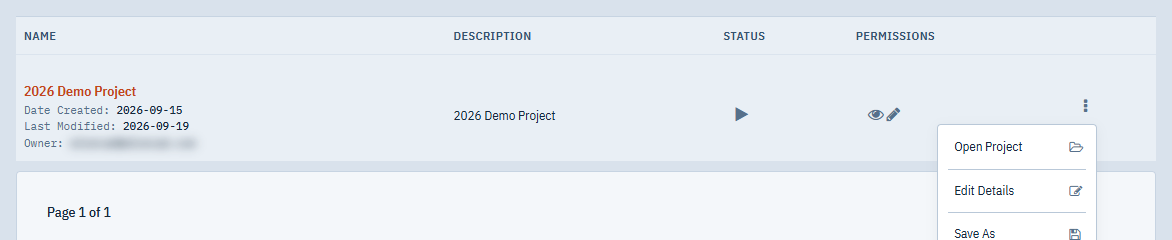
| Command | Shown when |
|---|---|
| Open Project | Always, for active projects |
| Edit Details | You can edit the project |
| Save As | You can edit the project |
| Delete | You created the project, or your team role can delete projects |
| Sharing Tools | You can edit the project |
| Archive Project | You can edit the project and you are on a paid plan |
| Extract Archive | The project is archived, you are on a paid plan, and you have room for another active project |
Edit Details
Change the Project Name or Description, then click Save Project. Click Back to List to leave without saving.
Save As
Save As makes a copy of the whole project under a new name. It isn’t available on the Free plan, and it counts as a new project against your limit.
- Choose Save As from the row menu.
- Enter the new Project Name and Description.
- Click Save Project As.
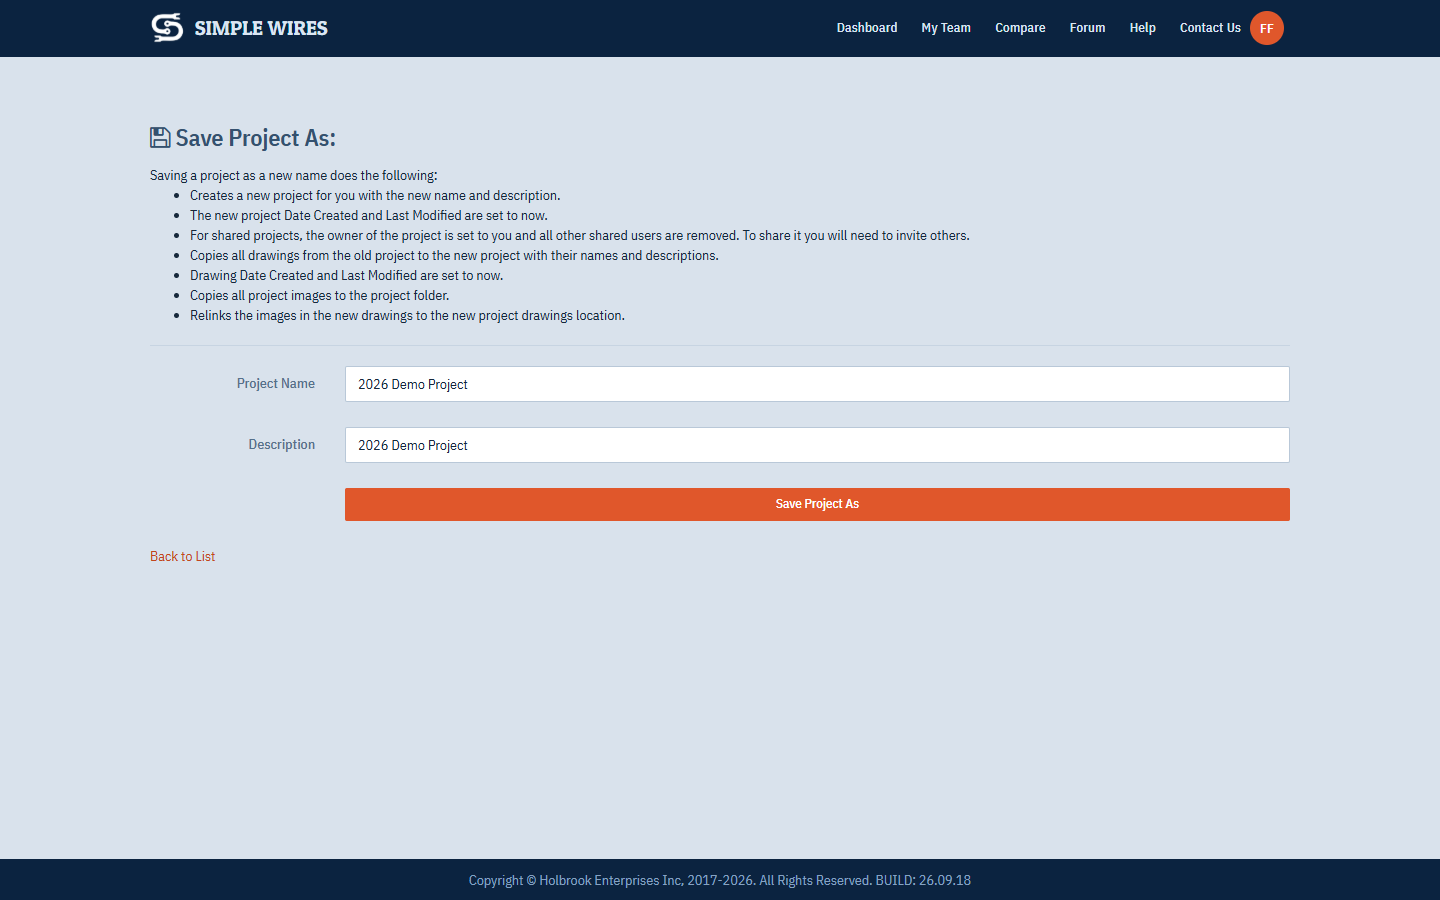
The copy:
- Is owned by you, with Date Created and Last Modified set to now.
- Contains copies of all the project’s drawings, with their names and descriptions.
- Contains copies of the project’s signal types and images. Images in the copied drawings point to the new project.
- Is not shared with anyone, even if the original was. Invite people again from Sharing Tools.
Drawing revisions are not copied. The copied drawings start with no revision history.
Delete
- Choose Delete from the row menu.
- Check the project name, description and date on the confirmation page.
- Click Delete, or Cancel to go back.
Deleting a project removes it, and all its drawings, for everyone it is shared with. This can’t be undone. If you might need the project later, archive it instead.
Sharing Tools
Opens the sharing page for the project, where you invite people and set their permissions. See Sharing Projects.
Archive Project and Extract Archive
Archiving takes a project out of your active project count without deleting it. The project stays in your list with the archive icon, but you can’t open it.
To archive a project:
- Choose Archive Project from the row menu.
- Click Archive on the confirmation page.
To bring an archived project back:
- Choose Extract Archive from the row menu. The page shows who archived the project and when.
- Click Extract Archive.
You need room under your project limit to extract an archive. If you are at the limit, an archived project has no row menu. Archive or delete another project first.
An archived project’s row menu offers only Extract Archive. To delete or share an archived project, extract it first.
New drawing settings
Click Config to set the defaults that every new drawing starts with. Config isn’t available on the Free plan or to view-only team roles.
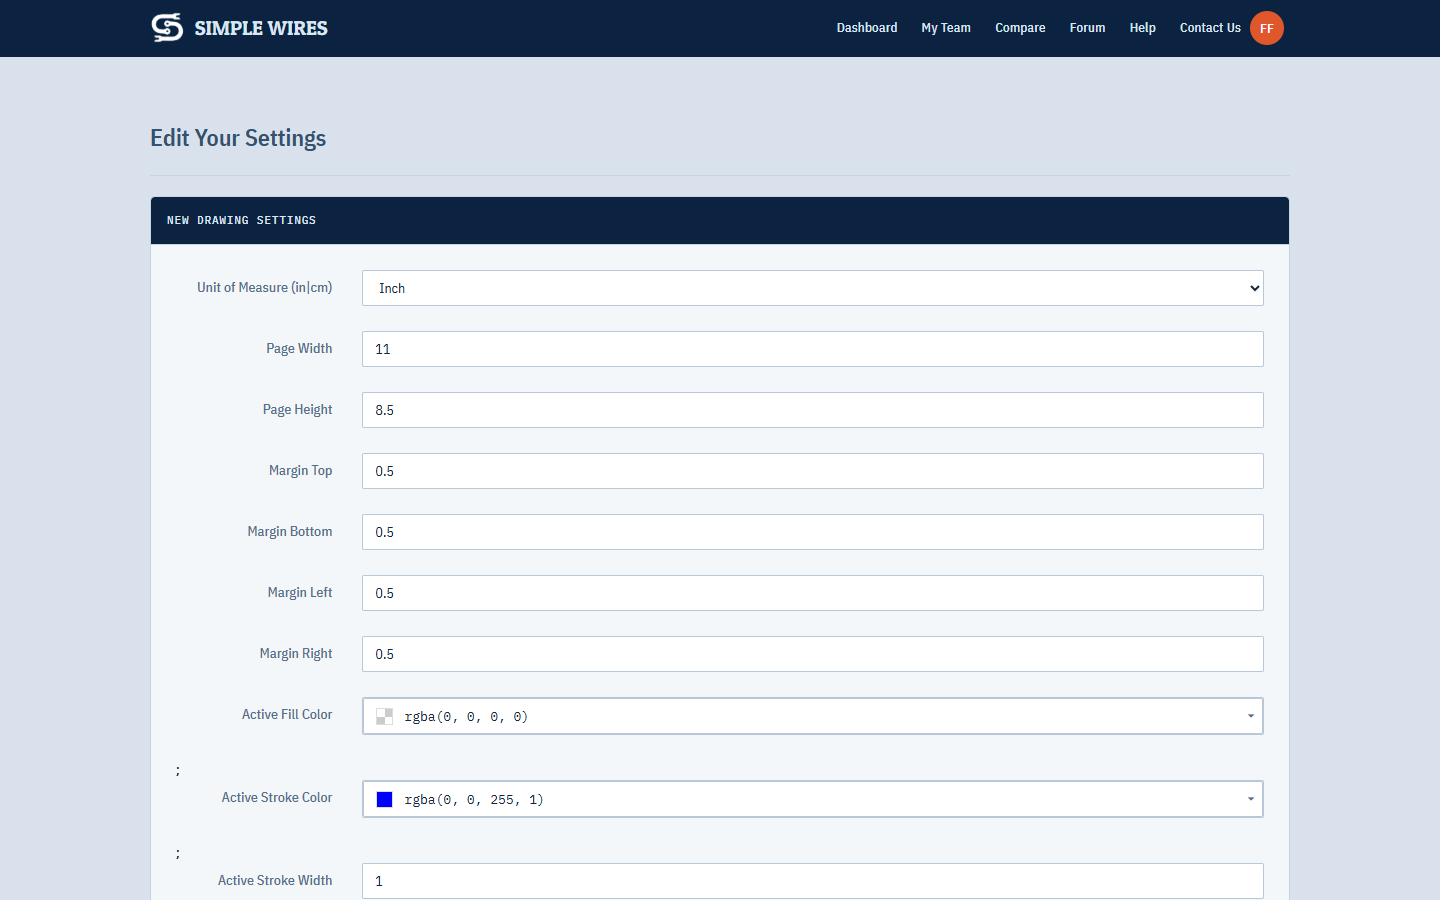
Under New Drawing Settings:
- Unit of Measure (in|cm): Inch or Centimeter.
- Page Width and Page Height
- Margin Top, Margin Bottom, Margin Left and Margin Right
- Active Fill Color and Active Stroke Color
- Active Stroke Width
If you belong to a team, a Team Email Notifications panel lets you choose which team events email you: when a drawing is deleted, a new drawing is created, a new project is created, a new team member is created, a project is archived or extracted, a project is deleted, or a team member is deleted.
Click Save Settings. The settings apply to drawings you create from now on. To change the page setup of an existing drawing, see Page Setup and Drawing Settings.