Racks and Rack Panels
Use racks and rack panels to draw rack elevations. A rack is sized in rack units, panels snap into its positions, and each mounted panel’s Location is filled in from the rack, so your equipment list shows where everything is installed.
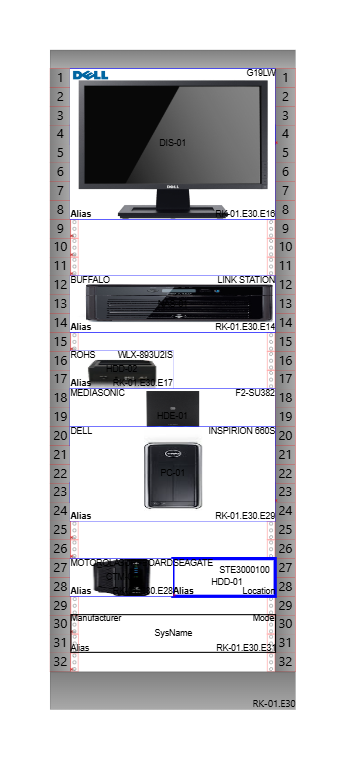
Rack units
A rack unit (RU) is the standard height of rack-mounted equipment: 1.75 in (44.45 mm). Racks and panels in Simple Wires are measured in whole rack units. A rack shows its unit numbers down both sides, and a panel’s height is a whole number of units.
Creating a rack layout
- Open the drawing and expand Resizable Racks in the library pane.
- Drag a rack onto the canvas. The section is grouped into Numbered bottom-up, Numbered top-down and Colour presets, in sizes from 4 to 48 rack units, so you can start from one close to what you need. Switch the section to List to read each rack’s size and which end it counts from.
- Select the rack and drag the grip on its top or bottom edge until the rack has the number of rack units you need. The height snaps to whole units and the unit numbers are redrawn.
- Give the rack its names. Its Location,
RK-01to start with, is the name its panels use, so set it to the rack’s real name first. - Expand Resizable Rack Panels and drag a panel onto the rack at the position where it mounts. The panel snaps to the nearest rack position when you drop it.
- Repeat for each panel, then name each panel’s Manufacturer, Model and SysName.
You can also place racks and panels for real equipment from the Master Library, sized to the equipment’s height. See Master Library.
When a panel snaps into a rack, its Location changes to the rack’s Location followed by the rack
position, for example RK-01.E12. If you detach the panel, its Location goes back to Location.
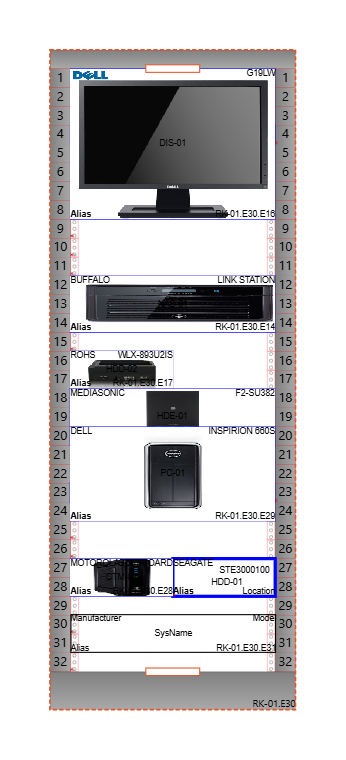
Moving racks and panels
Panels mounted in a rack travel with it. Dragging the rack, or dragging any panel mounted in it, moves the whole rack with all of its panels.
To move one panel on its own, detach it first (see below).
Changing the height of a rack detaches its panels and then re-attaches the ones that still sit on a rack position.
Detaching panels
There are two ways to free a panel that is mounted in a rack:
- Right-click the panel and choose Detach, then drag it where you want it.
- Hold Shift while you drag the panel. It comes out of the rack and moves on its own.
To free every panel in a rack at once, right-click the rack and choose Detach all.
Rack colours
Three of the racks in Colour presets come filled in white, light grey and mid grey, 42 rack units tall. Any rack takes a colour of its own: select it and set Fill Color on the General tab of the properties pane, and Stroke Color, Stroke Width and Line Type for its outline. A rack keeps the drawing’s own look until you set those, so racks in older drawings don’t change.
Right-click a rack and tick Transparent background to let the page show through between its rails. The colour presets come with it turned on.
Rack panel size
Select a panel to show its grips. Drag the grip on the top edge to change the panel’s height in rack units, and the grip on the right edge to change its width, for example to draw a half-width panel.
The Resizable Rack Panels section is grouped into Full width, Half width and With glue points. The half-width panels, 1 to 5 rack units tall, carry a glue point on their right edge, so a second half-width panel snaps beside the first to fill the rack position. See Panels on panels.
Rack options
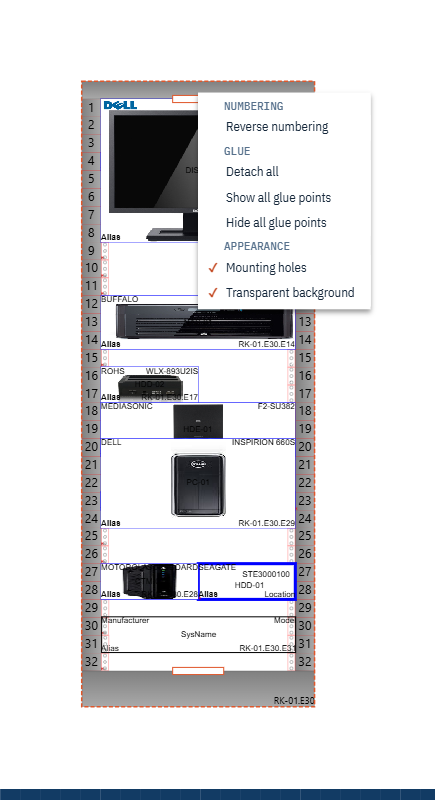
Right-click a rack for these commands, grouped under headings:
- Under Numbering, Reverse numbering switches the rack’s unit numbers between counting from the top and counting from the bottom. The panels stay where they are and keep their positions, and their Location is rewritten to match the new numbering.
- Under Glue:
- Detach all frees every panel mounted in the rack.
- Show all glue points and Hide all glue points show or hide the snap points on the rack and its panels.
- Under Appearance, two settings that show a tick when they’re on:
- Mounting holes shows the holes drawn on the rack rails.
- Transparent background lets the page show through between the rails.
Panels on panels
A rack panel can carry its own snap points, called glue ports, so another panel can attach to it, for example a half-width panel beside another. Right-click a panel and, under Glue:
- Add glue port adds a snap point to the selected panels. Drag the small marker to where the other panel should attach.
- Show all glue ports and Hide all glue ports show or hide the markers.
Right-click a glue port marker to Remove Glue Port or Hide Glue Port.
A panel attached to another panel extends that panel’s Location with its own position.
Labels and the Bill of Materials
Racks and panels have the same Manufacturer, Model, SysName, Alias and Location labels as functional blocks. Click a label to edit it, and right-click a panel to switch labels under Labels. See Naming blocks.
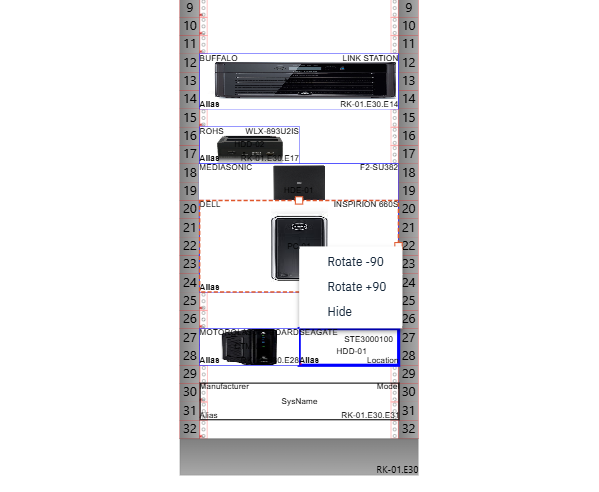
On a rack panel you can also right-click a single label and choose Rotate -90, Rotate +90 or Hide.
Rack panels aren’t counted in the Bill of Materials unless you ask for it: select the panel and check Count in BOM on the General tab. Racks are counted by default. See Lock Position and Count in BOM.