Off Sheet Pointers
Off sheet pointers (also called sheet references or feathers) let a cable leave one drawing and arrive in another. The source drawing shows the cable from the source port to a pointer. The destination drawing shows the same cable from a pointer to the destination port. Once the two pointers are linked, each one shows the equipment, port and drawing at the other end.
Pointers also work within a single drawing, for example to avoid a long cable run across the page.
Pointer types
Open the Off Sheet Pointers section of the left pane. It holds the same two pointers in five shapes: off-page connector, rounded rectangle, arrow, open arrow and square arrow. Switch the section to List to read which is which: the shapes are captioned To, off-page, To, rounded, To, arrow and so on, under the headings To another drawing and From another drawing.
- To another drawing, also called an Off Right pointer: has one input, and is drawn with a green outline. Place it in the source drawing and cable the source port to it.
- From another drawing, also called an Off Left pointer: has one output, and is drawn with a red outline. Place it in the destination drawing and cable it to the destination port.
The rest of this page and the app’s own messages use the Off Right and Off Left names. The palette draws its icons in the pane’s own colour, so you see the green and red outlines once a pointer is on the page.
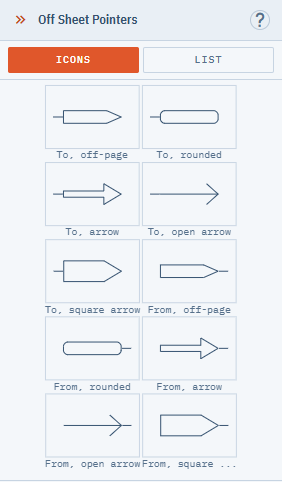
The open arrow and square arrow are half as wide as the others, and they carry their labels beside the shape instead of over it: the system name, then the port, then the drawing at the other end. Use them where a pointer sits in a crowded part of the page.
What a pointer shows
A pointer carries the details of the other end, so you can read a cable’s destination without opening the other drawing. Each one shows, from the top: the manufacturer and model of the equipment at the other end, its system name, the port name and connector the cable lands on, and the name of the drawing it’s in.
Until it is linked, a pointer shows placeholder text such as Other Port, ?? and Other Drawing. After linking, the text is filled in from the other end and kept up to date; you can hide or restyle each line, but you can’t type over it. See Changing the appearance of pointers.
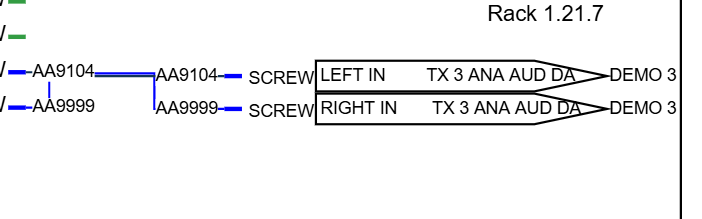
In the source drawing, the cable runs from the source port into the Off Right pointer:
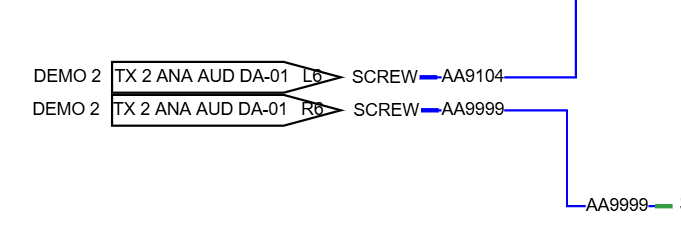
In the destination drawing, the matching Off Left pointer feeds the destination port:
Rules
- A pointer links only to another pointer: an Off Right pointer to an Off Left pointer.
- Each pointer takes exactly one cable. A cable can’t go straight from one pointer to another.
- Both pointers need their cable before you link them.
- The signal flows one way: source port, cable, Off Right pointer, then Off Left pointer, cable, destination port.
Placing pointers
Work through the source drawing first, then the destination drawing. Both pointers need their cable before you can link them.
In the source drawing
- Open the drawing that has the equipment the signal leaves.
- Expand Off Sheet Pointers in the library pane and drag one of the To another drawing pointers onto the page, near the edge the cable leaves by.
- Draw a cable from the source port to the pointer’s input on its left. See Drawing Cables.
- Save the drawing with File > Save or Ctrl+S.
In the destination drawing
- Open the drawing where the signal arrives.
- Drag the matching From another drawing pointer onto the page.
- Draw a cable from the pointer’s output on its right to the destination port.
- Save the drawing.
Each pointer takes one cable, so use a pair of pointers for each signal that crosses drawings. Place the pointers where they read easily, such as down one edge of the page, and use the open arrow or square arrow where space is tight.
Linking pointers
You can start from either drawing.
-
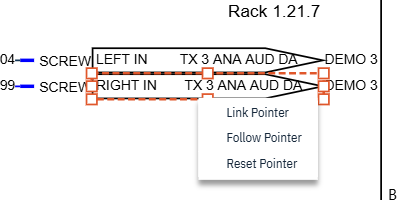
Right-click a pointer and choose Link Pointer. The Select Other Pointer dialog opens.
-
Under Select Drawing, choose the drawing that has the other pointer. A preview of that drawing appears. Pick the drawing you are in to link two pointers on the same page.
-
In the preview, click the other pointer to select it. You can zoom the preview with the mouse wheel.
-
Click Do It!.
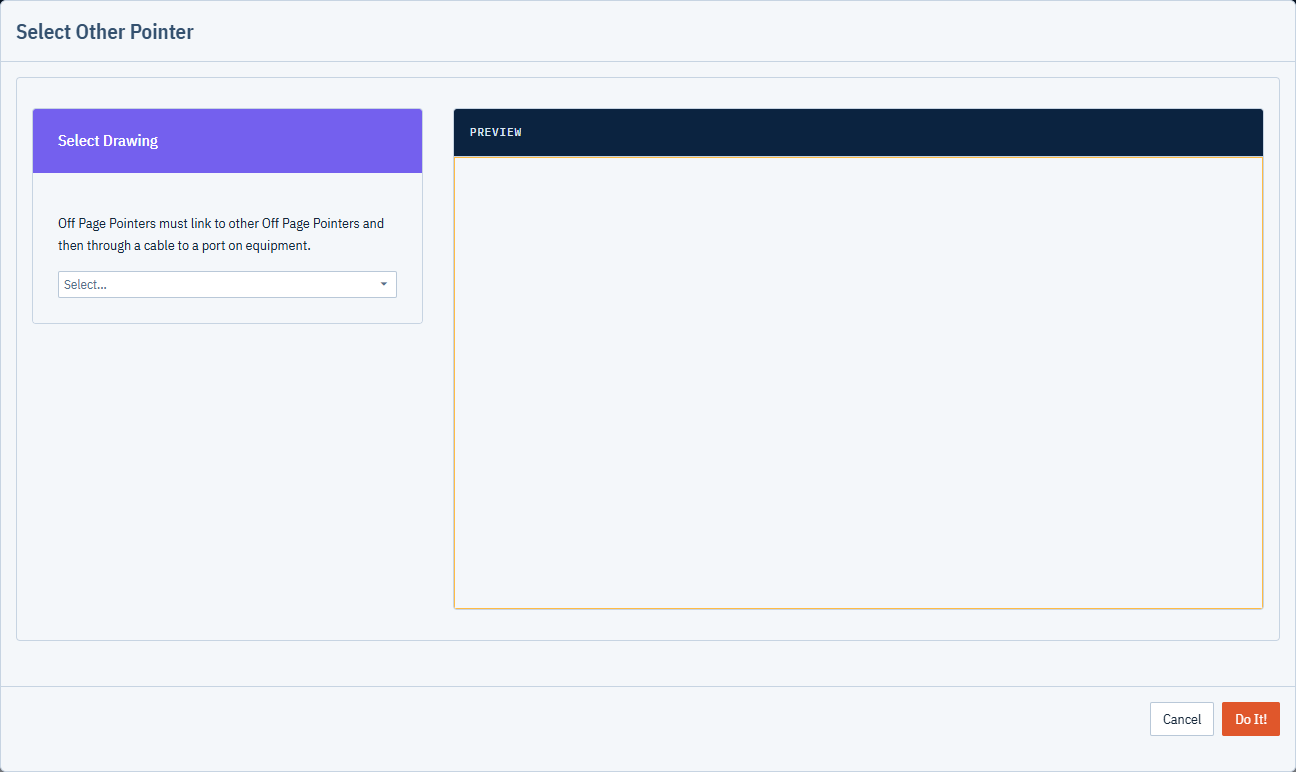
Both pointers now show the system name, port name and connector of the equipment at the other end, and the name of the other drawing. Simple Wires saves both drawings.
To check a link, right-click the pointer and choose Follow Pointer: the other drawing opens with its pointer selected. If it opens the wrong drawing, or the text still reads Other Drawing, the pointers aren’t linked to each other.
If the link fails with Link Failed! Please link a left pointer (RED) to a right pointer (GREEN), check that you picked an Off Left pointer to go with an Off Right pointer (or the other way round), and that both pointers have a cable.
Save both drawings before you link. The dialog reads the other drawing as it was last saved.
Following and resetting a pointer
Right-click a linked pointer to use:
- Follow Pointer: opens the other drawing and selects the linked pointer.
- Reset Pointer: unlinks this pointer and returns it to its placeholder text.
Reset Pointer only unlinks the pointer in the drawing you are in. Open the other drawing and reset its pointer as well.
How cable data flows across drawings
After you link two pointers, the two cables act as one:
- Changing the source or destination equipment’s text (system name, manufacturer, model, alias, location), or a port’s name or connector, updates the pointer and the cable in the other drawing.
- Changing the cable number, length, cable type, signal type or stroke properties of one cable updates the other.
- Simple Wires saves the other drawing for you. If someone on your team has it open, it updates on their screen.
- Renaming a drawing updates the drawing name shown on every pointer that points to it.
In the project data:
- The Cables grid lists both halves of the cable, one for each drawing. Both have Is Off Sheet Pointed checked; the destination half also has Is Off Sheet Pointed Right checked. Filter on that column to list each cable once.
- The Bill of Materials counts the cable, its connectors and its cable type once, from the source half. Pointers themselves are never counted as equipment.
See Project Data Grids.
Changing the appearance of pointers
You can’t type into most of a pointer’s text, because it comes from the other end. You can change how the pointer looks.
- Select one or more pointers.
- On the General tab of the right pane, pick a different Shape, or change the stroke and fill. Drag the resize handles to change the size.
- On the Text tab, choose a Text Kind (for example SysName or Drawing Name), then set its Font, Size, Foreground color, or bold and italic. Use the eye button to hide that text.
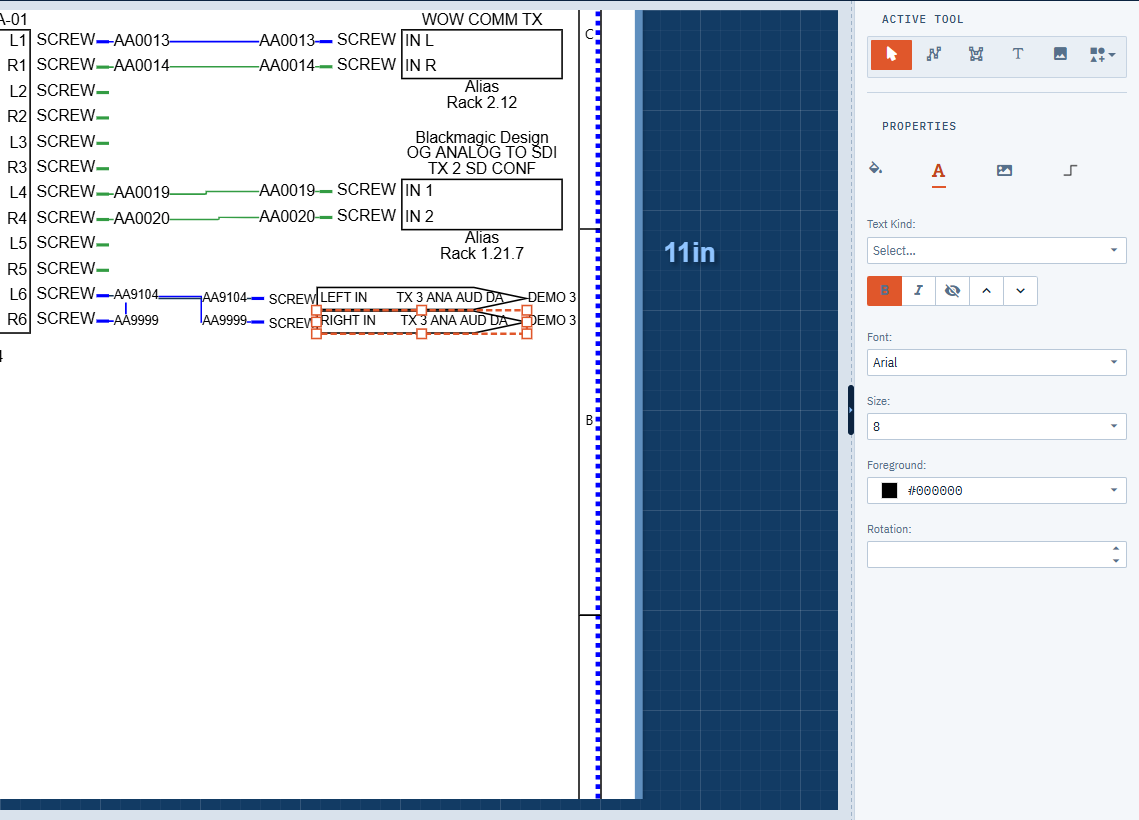
See Shapes, Text and Images for the General and Text tabs.